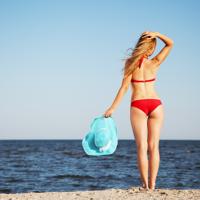
There’s something undeniably alluring about beach waves. They evoke a sense of carefree days by the ocean, with just the right amount of tousle to capture that perfect “effortlessly chic” look. If you’ve been wanting to achieve those soft, natural waves without stepping foot on the sand, you’re in the right place. Let’s dive into the art of creating beachy waves at home, and explore the tools and techniques that can help you nail this look.
Understanding Beach Waves
Before you get started, it’s helpful to understand what makes beach waves different from other curls. Beach waves are more relaxed and less polished. They resemble the natural effect of saltwater and wind on your hair, which results in imperfect, flowy texture. Think tousled and lived-in, rather than structured and uniform.
Tools You Might Need
Creating beach waves can be done with a variety of tools, and your choice might depend on your preferred method or what you have on hand. Here are a few common tools:
- Curling Iron or Wand: Opt for a medium-sized barrel, around 1 to 1.5 inches. This size helps to create loose, natural-looking waves.
- Flat Iron: A flat iron can achieve waves by twisting the hair while sliding down the strands.
- Texturizing Spray: Enhances the waves and provides a beachy vibe. Sea salt sprays are popular for this purpose.
- Blow Dryer with Diffuser: Useful for those with naturally wavy hair looking to enhance their texture.
Step-by-Step Guide
Prep Your Hair
-
Start with Clean Hair: Begin with freshly washed hair. Use a light, volumizing shampoo and conditioner to prevent flattening your hair.
-
Apply a Heat Protectant: Protecting your hair from heat damage is vital. Apply a heat protectant spray evenly before using any styling tools.
-
Add a Texturizer: Spritz a texturizing spray or sea salt spray on damp hair to help set the waves and add grip.
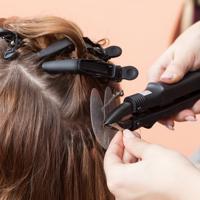
Technique with a Curling Wand
-
Section Your Hair: Divide your hair into sections. It’s often easier to manage by splitting hair into two main sections before working through smaller ones.
-
Wrap Hair Around the Wand: Take a 1-inch section of hair and wrap it around the wand, away from your face. Leave the ends out for a natural finish.
-
Hold and Release: Hold for about 5–10 seconds and gently release. Avoid clamping the hair too tightly, as looser wraps create more natural waves.
-
Repeat: Continue through your hair, alternating the direction of the curls for a more relaxed wave pattern.
Technique with a Flat Iron
-
Clamp and Twist: Clamp a small section of hair near the root and twist the flat iron away from your face.
-
Slide Down: Slowly slide the flat iron down the shaft of your hair while maintaining the twist.
-
Finish All Sections: Repeat this technique throughout your hair, varying the direction of your twists for a more effortless look.
Finishing Touches
-
Tousle and Set: Use your fingers to break up the curls, creating that tousled appearance.
-
Add More Texture: If needed, spray a little more sea salt spray to enhance the beachy feel.
-
Soft Hold Hairspray: Lightly mist a flexible hold hairspray to maintain the waves without stiffness.
Tips for Different Hair Types
-
For Fine Hair: Use a lightweight volumizing mousse prior to blow-drying. This can help in holding the waves better.
-
For Thick Hair: Larger sections work better and can reduce time spent curling. You might also need extra texturizing spray to help with definition.
-
For Naturally Wavy Hair: Embrace your natural texture. Apply a curl-enhancing cream or mousse and use a diffuser attachment on your blow dryer. Scrunch with your fingers for added shape.
For more insights into choosing the right products for your hair type, consider this guide on Allure which offers a range of recommendations.
A Gentle Reminder
Remember, practice makes progress. The beauty of beach waves lies in their imperfection, so there’s no need to aim for exact symmetry. Have fun with it and discover what works best for you, adjusting technique and tools as needed. The sea and sun will surely be jealous of your skills!